Scapy is a powerful Python package that captures, reads, and manipulates packets. In this walkthrough, we will use it to capture packets on the network, work with PCAP files, and analyze individual packets within a PCAP file.
CTRL + SHIFT + c and CTRL + SHIFT + v rather than the normal CTRL + c and CTRL = vCTRL + cThis walkthrough will use the Python programming language. It's recommended that you're familiar with the basics of this language:
If you're confident with that list, fantastic! If not, you might want to start with our quick Python walkthrough here and then come back to this spot.
In this section, you will run the interactive Scapy tool from the command line and use it to capture packets to a PCAP file. Then you will read the file back and examine data from individual packets.
Run Scapy as root:
$ sudo scapy
The password on your machine is: 1
This will take you into the Scapy terminal or interactive shell. A Scapy shell is very similar to a Python shell. Enter the following commands to sniff 10 packets and write them to a PCAP file called sniffed.pcap:
>>> packets = sniff(count=10, iface="eth0")

            >>> packets

            >>> wrpcap('sniffed.pcap', packets)
Note: If it's taking a while to collect packets, try reloading this web page or going somewhere else on the internet. That's a good source of TCP and IP packet data! You may also want to do this in conjunction with collecting more packets. Try increasing the count number.
Exit the shell with the command:
>>> exit
Now we're going to confirm that the file sniffed.pcap has been created. Use ls to view a list of files in the directory:
$ ls
Files can be read again and turned back into packets using Scapy. Let's enter the Scapy command prompt again and use the command rdpcap to read the PCAP file:
$ sudo scapy
>>> packets = rdpcap('sniffed.pcap')
You can iterate through each packet and examine them using Python. For example, if we wanted to print each packet:
>>> for pkt in packets:

            >>>   print(pkt)
Note: Press enter twice to execute your loop. Pressing enter after the line print(pkt) will create another indented line to optionally write something else under your loop. Pressing enter again will exit the loop and execute it.
You can also extract things like the source IP, destination IP, and IP Protocol number (https://en.wikipedia.org/wiki/List_of_IP_protocol_numbers) of each packet.
>>> for pkt in packets:

        >>>   if pkt.haslayer('IP'):

        >>>     print(pkt['IP'].src)

        >>>     print(pkt['IP'].dst)

        >>>     print(pkt['IP'].proto)
To print TCP fields such as flags and port numbers, do:
>>> for pkt in packets:

        >>>   if pkt.haslayer('TCP'):

        >>>     print(pkt['TCP'].flags)

        >>>     print(pkt['TCP'].sport)

        >>>     print(pkt['TCP'].dport)
CTRL + d to go to the next section.
In this section, you will use the command line to do a little navigation. We’ll introduce the datasets used to train the machine learning model and show you how to use iPython (Jupyter) Notebooks to access the rest of the workshop code.
Navigate to the tools folder on the Desktop:
$ cd Desktop/wtw
Use the ls command to list all the files there (or you can view them in file explorer):
$ ls
You should see a directory and a file there:
pcapsnotebook.ipynbThe pcaps directory contains all PCAP files used for this workshop. It has the following structure:
dns
testtraintesttraintesttrainThere are three different attack scenarios we will be training machine learning models to recognize:
Each attack PCAP directory (dns, ftp, and http) contains directories with both test and train PCAP files.
Training files are used to train the machine learning model. Each test and train directory contains PCAP file examples of both "non-attack" traffic and "attack" traffic. Files ending in "_1.pcap" are attack traffic. Files ending in "_0.pcap" are normal traffic.
Testing files are used to score the machine learning model and get a sense of its performance on real world data. This data is still labeled as "attack" or "non-attack" traffic, but when we're testing the model it makes a prediction first without looking at the label, then uses the label to score itself on its performance.
The notebook.ipynb file contains code for:
pcapstatsIn this section you'll learn a little bit about Scikit-learn and how to work with it in an iPython notebook file, using Jupyter Notebook to read and run the notebook file.
The Scikit-learn package is the Swiss Army knife of machine learning in Python. It does everything. Today, we want to use it to make a model that is able to decide whether a PCAP file contains normal (class 0) or attack (class 1) traffic.
This kind of model is called a "classifier." It classifies records into one of multiple discrete types, depending on how it was trained. In this case, we have two different types of data: normal and attack.
Typically, when data scientists create a machine learning model, they use an interactive visual Python file type called an iPython notebook. There are many pieces of software that can read, run, and write iPython notebooks, but one of the most popular is "Jupyter Notebook."
The iPython notebook file format makes it easy to train and test the model step by step, view the output as you go, and go back and make changes as needed.
To start up the Jupyter Notebook IDE make sure you're in the wtw directory:
$ cd ~/Desktop/wtw
Then start Jupyter Notebook with:
$ jupyter notebook
This will start a local web server on your machine. Jupyter should automatically open in your browser at localhost:8888
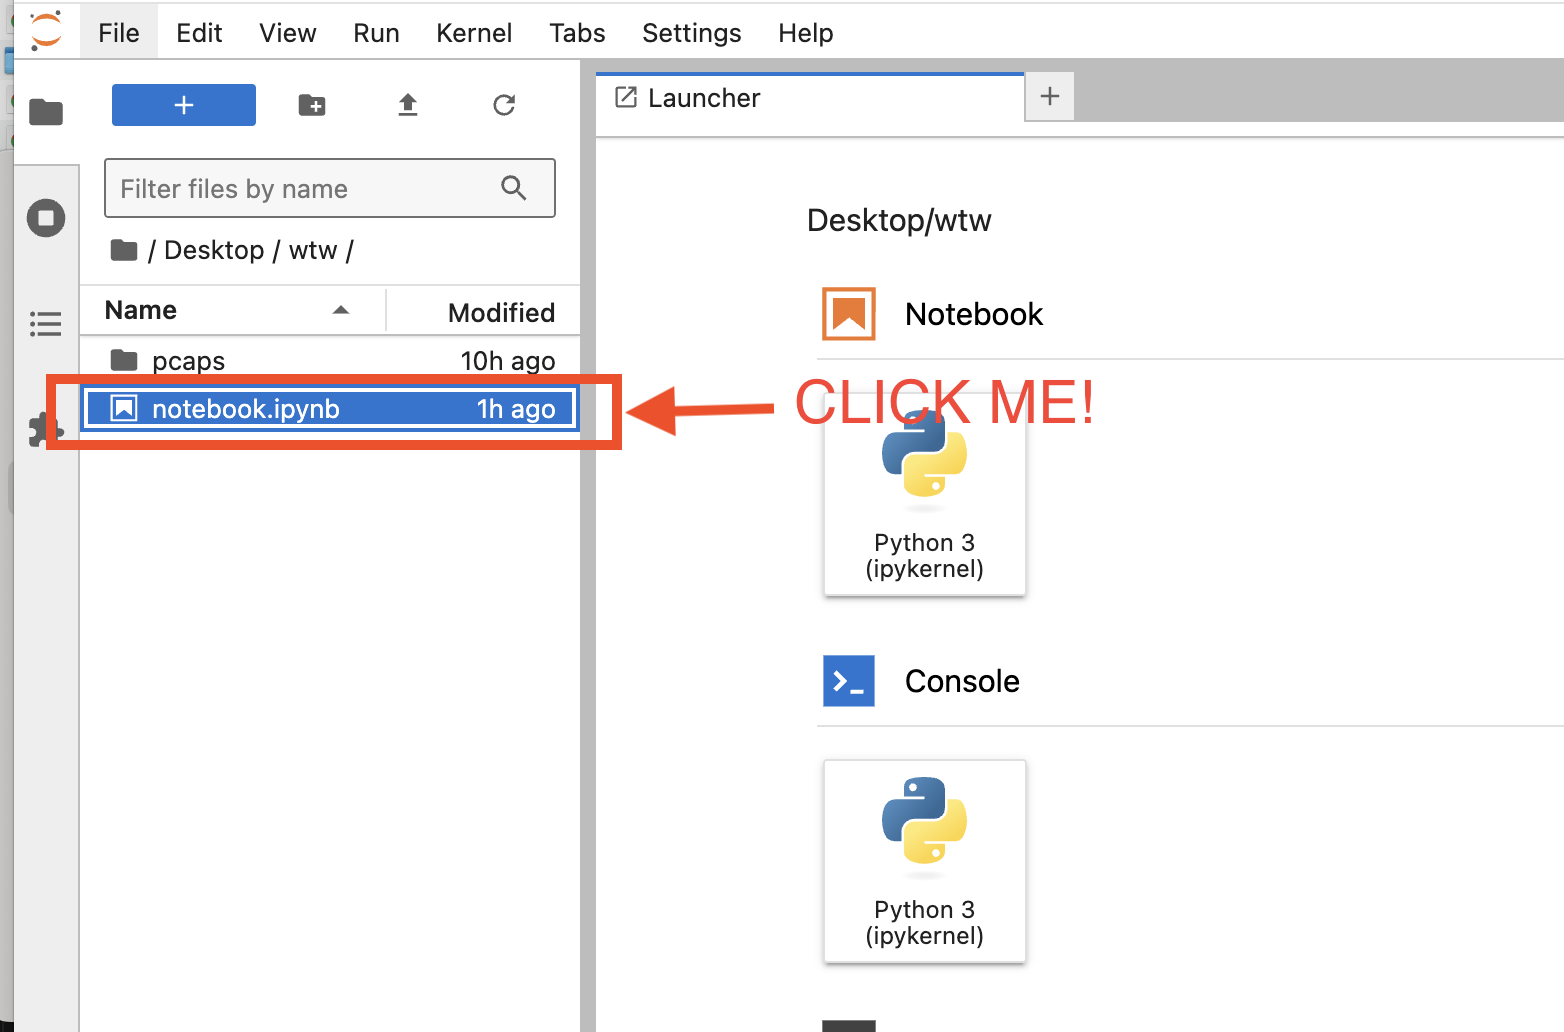
Open the file notebook.ipynb:

From here, continue this walkthrough in Jupyter!